Desktop computers and laptops are a daily necessity in our digital life. Different tasks may require screenshots or screen recordings at different times. You can easily take screenshots and screen videos on a computer following the steps below.
Table of Contents
How to take screenshots?
There are many ways to take screenshots on a computer or laptop. Here are two of the easiest and most used methods.
- Print Screen
- Lightshot (Software)
Print Screen
It is a built-in function for every computer or laptop and it’s very easy to use. To take a screenshot you have to press the Print Screen Key shown below from your Keyboard. You’ve taken a screenshot that you can paste and save to an image using image processing applications. You can do this by pressing the Windows + PrtScn Key together so you don’t have to save the screenshot separately. It will be automatically saved to the specific location of your drive.
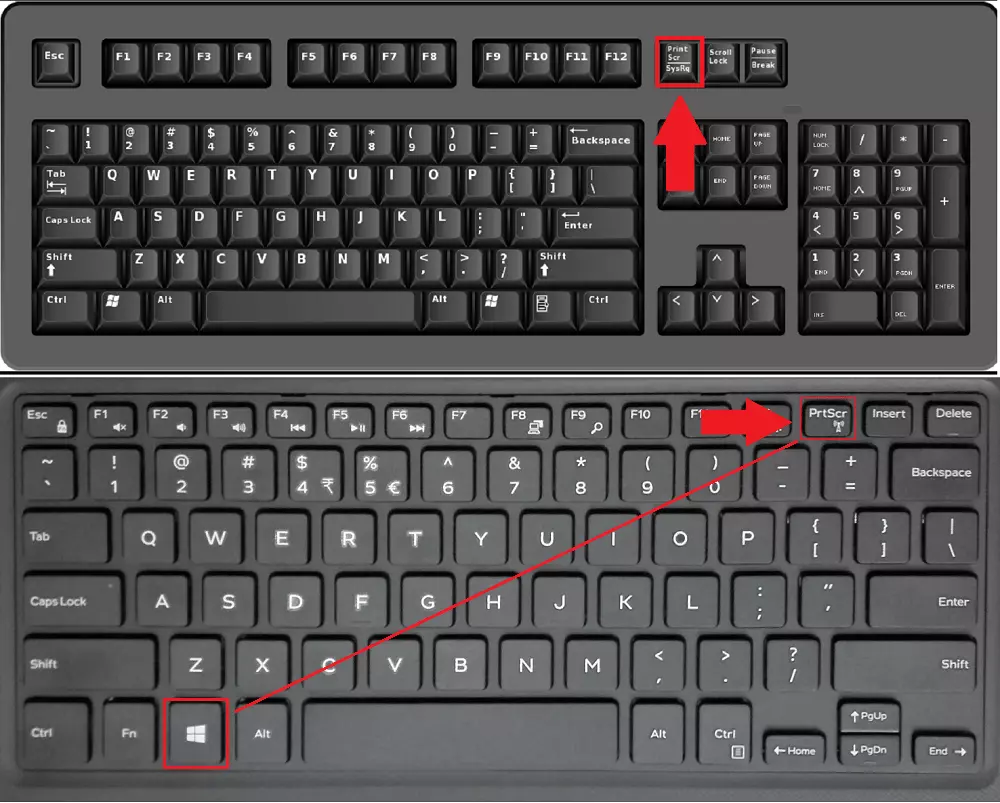
Now you can send the screenshot by pressing Ctrl+V or if you want to save it on your device then search by typing Paint in the Window Start Menu and open it.
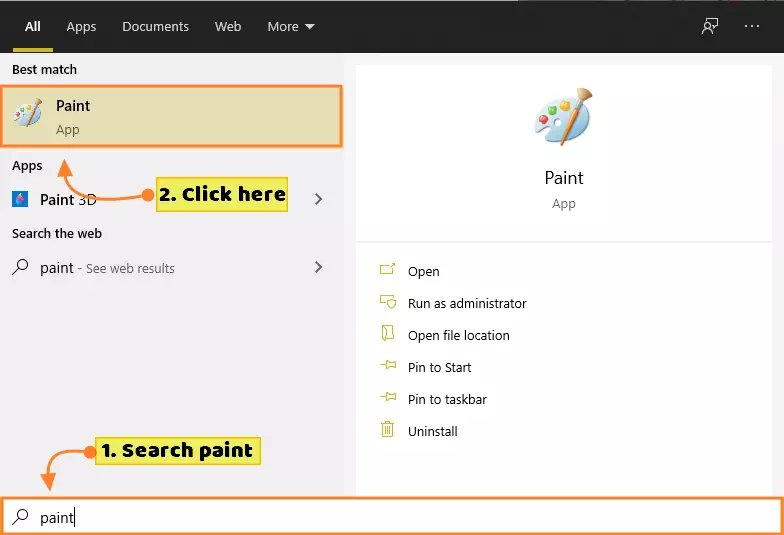
After opening the Paint software press Ctrl+V to paste the screenshot or if you want to save it then press Ctrl+S, select folder location and click the Save button.
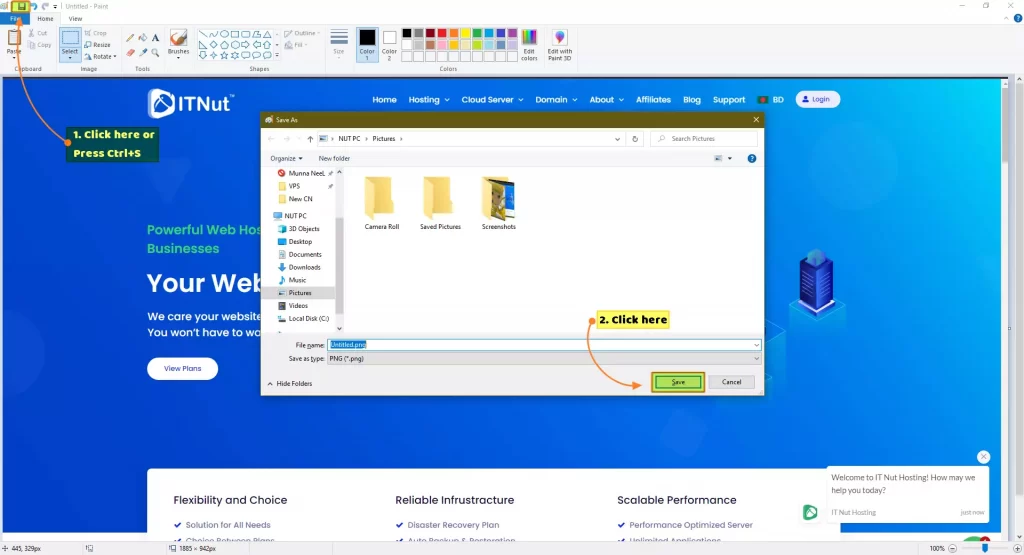
Your screenshot is saved to your computer. Following this way you can take screenshots without any software or extension.
LightShot
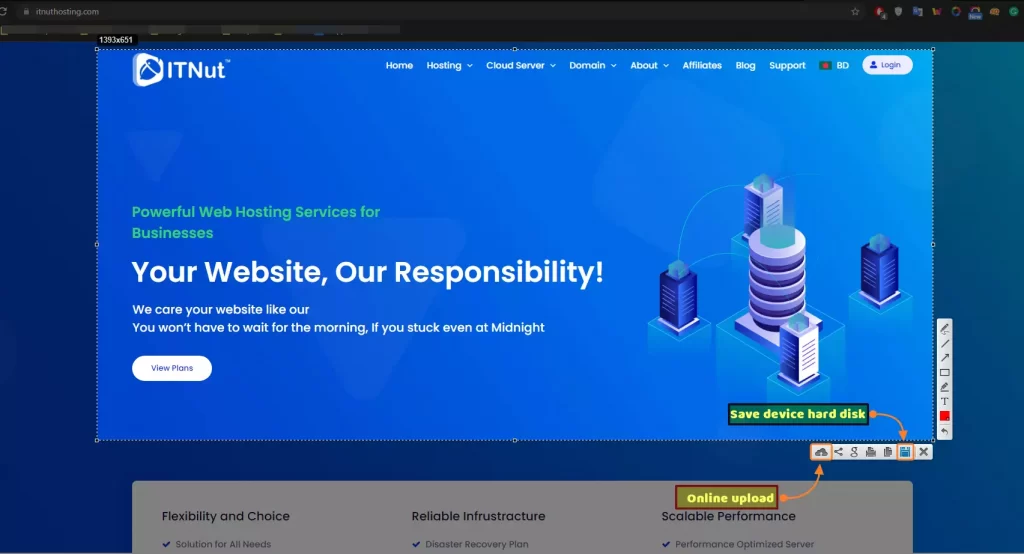
LightShot is a Screenshot software. You can take screenshots more easily using the LightShot app. Because with this software you can save the screenshot to the hard drive with just one click or upload it directly online and see the screenshot only through the link and you can share the screenshot only through this link if you want. For this, Download and install the Lightshot software. After installing the software will be added to your taskbar.
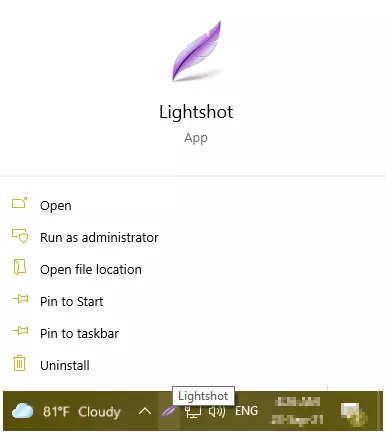
Now if you want to take a screenshot, just press the Print Screen Key from the Keyboard and you will have the option to capture a screen. After selecting the part you want to take a screenshot dragging the cursor, click on the Save Icon and your screenshot will be saved.
To get a direct link, click on the Online Upload icon or press Ctrl + D, the screenshot will be automatically uploaded online and a link will be shown at the bottom right of your screen. You can share it at your need.
How to record screen video?
You can record the screen with just one extension. To take easily screen record with a Chrome Extension, you can download and install from here Download and Install Loom Extension
First, you will see an interface like the screenshot below. Click the Add to Chrome button here.

A new pop-up window will appear in front of you. Click the Add Extension button here. The extension will be added to your Chrome browser shortly.

You can pin the extension for easy use. Click on the Pin button from the Extension option for Pin.

Now you need to log in with your Gmail, Slack, or Apple account. Select your account.
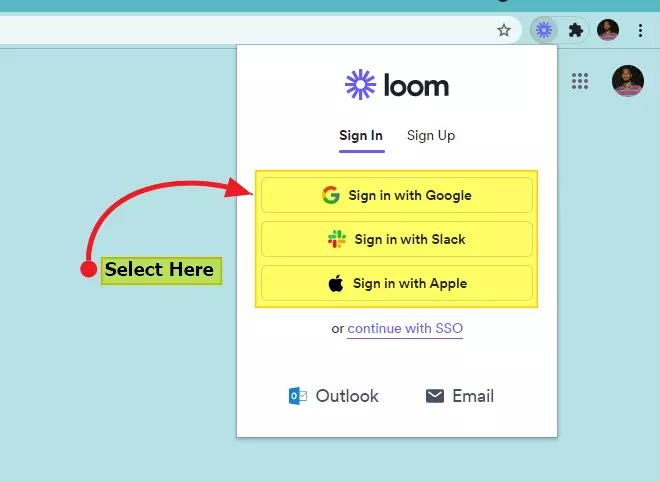
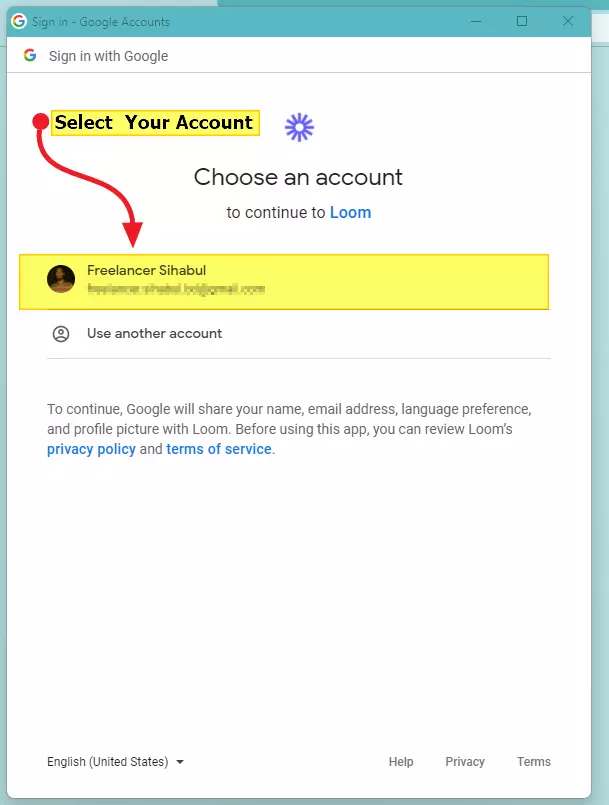
It will show you a list of your accounts to select for your specific account. Select the account you want to log in with. The first time you log in, you will be asked to accept the terms and conditions. Accept that.
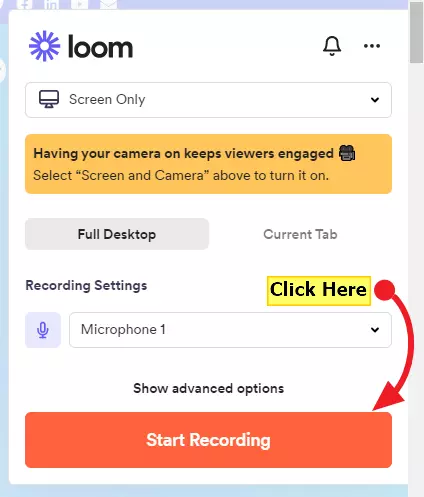
Now you can record the screen by clicking on Loom Extension pinned in your browser. After clicking on Loom Extension, a pop-up bar may appear. You have to skip that. Then on the right side, you will see another pop-up window. Click on the Start Recording button.
Now select your screen and click on the Share button. Your screen recording will start.

After recording, you can download the video or share the video by copying the link.
This extension is completely free and in the free version there are some limitations such as screen record time maximum of 5 minutes, maximum of 25 videos can be kept in the cloud, recording resolution 720p, etc. However, you can take the Upgrade version if you want.

